How to connect your enquiry form to a CRM
21 July 2026 · 3 min read
How to connect your enquiry form to a CRM

What does connecting your enquiry form to a CRM actually mean?
When you connect your enquiry form to a CRM, every submission your website receives routes automatically into your customer relationship management system as a live lead record. No copying from email. No spreadsheets. No missed follow-ups because someone was on holiday.
The core benefit is speed and accuracy. Integrating forms with a CRM eliminates most manual data entry, enabling teams to respond faster and route leads accurately within seconds of submission. For a small UK service business, that speed can be the difference between winning a job and losing it to a competitor who called back first.
Here is what the connection delivers in practice:
- Leads appear in your CRM the moment a form is submitted, with all fields populated
- Sales routing happens automatically based on rules you define (location, service type, budget)
- Duplicate detection keeps your contact database clean
- Follow-up sequences and notifications trigger without manual intervention
- Every lead source is tagged, so you know which pages and campaigns are working
The technical backbone of this process is data mapping (matching each form field to the correct CRM property) and automation triggers (the rules that fire when a new submission arrives). Get those two things right, and the rest follows.
What do you need before you start the integration?
Rushing into the technical setup without preparation is the most common reason integrations fail on the first attempt. Work through this checklist before you touch a single setting:
- CRM admin access: you need permission to create fields, manage API credentials, and configure automation rules
- API access enabled: some CRM plans restrict API use to higher tiers; confirm yours supports it
- Form platform identified: know whether you are using WPForms, Contact Form 7, Gravity Forms, or another tool, and confirm it supports your chosen integration method
- Field mapping plan prepared: list every form field alongside the matching CRM property and its data type (text, number, dropdown, date)
- API credentials or OAuth token ready: generate these in your CRM before you configure the form side
- Integration method chosen: native connector, webhook, or an iPaaS tool such as Zapier or Make
That last point deserves a moment. Native connectors launch fastest and suit simple lead or contact creation; iPaaS solutions handle complex workflows involving multiple tools; direct webhooks offer maximum control for high-volume or performance-sensitive setups. Pick the method that matches your actual complexity, not the one that sounds most impressive.
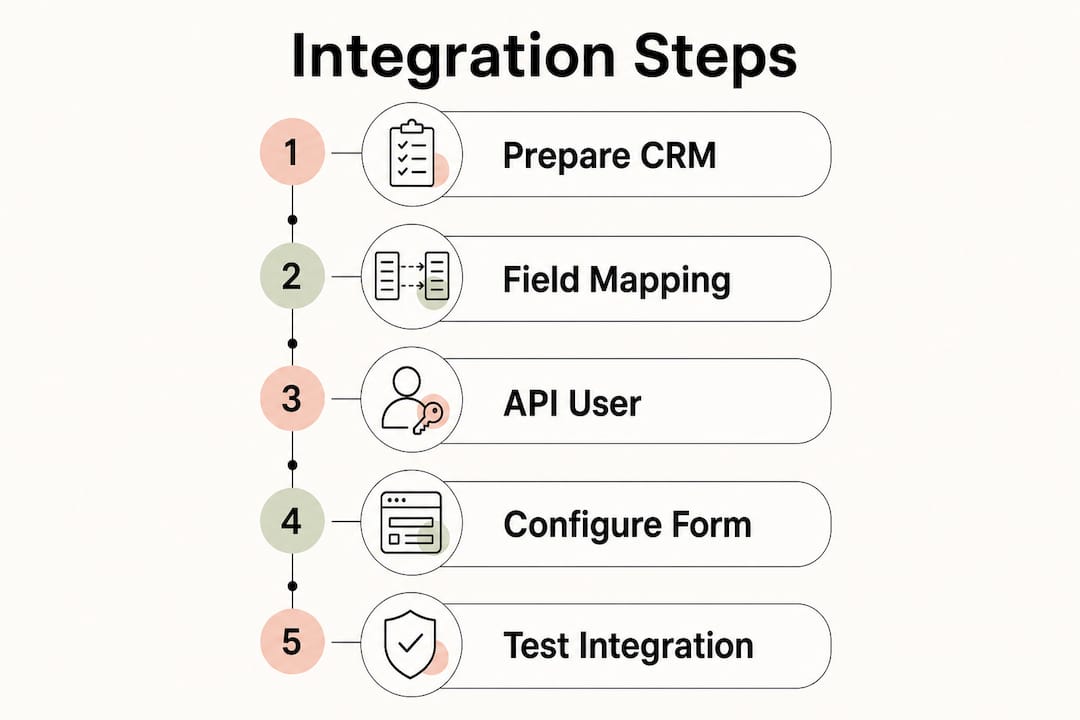
Step 1: Set up your lead entity and field mapping in the CRM
Before any data can flow, your CRM needs a place to receive it. Most platforms use a Lead or Contact object by default, but you may need to create a custom module if your enquiry type does not fit the standard structure.

The critical work here is the field mapping document. Most integration errors come from mismatched field types: a form sends plain text into a CRM dropdown field, and the record either fails silently or saves garbage data. Build a three-column document before you configure anything:
| Form field name | CRM field name | CRM data type |
|---|---|---|
| Full Name | Contact: Full Name | Text (single line) |
| Email Address | Contact: Email | |
| Service Required | Lead: Service Type | Dropdown / picklist |
| Message | Lead: Description | Text (multi-line) |
| Budget Range | Lead: Budget | Currency / number |
Keep field names consistent between your form and CRM. A mismatch as small as “phone_number” versus “Phone Number” can break a webhook payload.
Pro Tip: Create the mapping document in a shared spreadsheet before you touch the CRM or form settings. It takes 20 minutes and prevents hours of debugging later.
Step 2: Create a dedicated API user with limited permissions
Never use your personal admin account as the API credential for a form integration. If that account is ever deleted, renamed, or has its password changed, the integration breaks silently and leads stop arriving.
Instead, create a dedicated API user or service account with the minimum permissions required:
- Read/write access to the Lead or Contact object only
- No access to billing, user management, or sensitive pipeline data
- API scope limited to the specific actions the integration performs (create record, update record)
The steps vary slightly across platforms. In HubSpot, you generate a private app token with scoped permissions under Settings > Integrations > Private Apps. In Zoho CRM, you create an OAuth client under the Developer Console. In Pipedrive, you find the API key under Personal Preferences > API.
Pro Tip: Store API keys in a password manager or secrets vault, never in a plain text file or email thread. Rotate them every 90 days and update the integration immediately after.

Step 3: Configure your form to send data to the CRM
This is where the connection is actually made. Your three main options each suit a different situation:
- Native connector: a plugin or built-in integration that handles the API call for you. WPForms and Contact Form 7 both support direct integrations with HubSpot, Zoho CRM, and Pipedrive via dedicated WordPress plugins, with no coding required.
- Webhook: your form posts a JSON payload to a URL your CRM exposes. Webhooks provide full control and lower latency, but require error-handling logic such as exponential backoff and idempotency checks to guarantee delivery under real conditions.
- iPaaS (Zapier, Make): a third-party automation layer sits between your form and CRM, mapping fields visually. Useful when you need to route data to multiple systems or apply conditional logic without writing code.
Whichever method you choose, the field mapping step is the same: match each form input to its CRM property, respecting data types. Test with a real sample submission before going live. A comprehensive mapping document prepared in Step 1 makes this configuration straightforward.
Pro Tip: Add one or two intent-signal fields to your form, such as “What service are you interested in?” or “Approximate budget.” Capturing intent signals enriches each lead record and lets your sales team prioritise follow-ups without asking the same questions twice.
Step 4: Test your connected form integration thoroughly
Do not assume the integration works because the configuration saved without errors. Test it properly before any real leads arrive.
- Submit a test enquiry with every required field completed, using realistic data
- Open your CRM immediately and confirm the record was created with the correct field values
- Submit a second test using the same email address and verify your deduplication rules fire correctly (update the existing record rather than creating a duplicate)
- Check that any internal notifications or lead assignment rules triggered as expected
- Submit a test with a missing required field and confirm the form validation prevents submission rather than sending incomplete data
If a record does not appear, check the integration logs first. Most native plugins and iPaaS tools log every submission with a success or failure status. A failed webhook delivery usually means a malformed payload, an incorrect endpoint URL, or an authentication error on the CRM side.
What to do after your enquiry form is connected to your CRM
Getting the integration live is the start, not the finish. The real value comes from what you build on top of it.
- Monitor the integration logs weekly for failed submissions or field errors, especially after any CRM or form plugin update
- Audit your field mapping quarterly to catch any CRM property changes that break the sync
- Review lead source tagging to confirm each form submission carries the correct campaign or page attribution
- Add enrichment steps gradually: once the basic flow is stable, layer in automations such as instant email acknowledgements, sales team notifications via Microsoft 365, or quote workflow triggers
- Check for data quality issues such as blank required fields, inconsistent formatting in phone numbers, or leads arriving without a service type selected
The inbox trap is the most damaging failure mode: leads arrive by email but never enter the CRM, so they fall out of the pipeline entirely. A live integration with proper logging eliminates that risk. Review your enquiry form setup periodically to confirm submissions are still routing correctly end to end.
Best practices and common pitfalls when integrating enquiry forms with CRMs
Most integrations that fail do so for predictable reasons. Avoid these:
- Skipping the mapping document: guessing field names during setup causes type mismatches and silent failures
- Using a personal admin account as the API user: one password change breaks the entire integration
- No deduplication rule: without a unique identifier like email to define create-versus-update logic, your CRM fills with duplicate contacts within weeks
- Failing to test with real data: sandbox tests with dummy values miss formatting issues that only appear with actual user input
- Ignoring the inbox trap: if your form still sends an email notification as a backup, that is fine, but the CRM record must be the primary record of truth
- Over-complicating the form: long forms reduce submission rates; capture the minimum fields needed plus one or two intent signals
- No error alerting: set up email notifications for failed sync attempts so you catch problems before leads are lost
Pro Tip: Tag every lead with its source form and page URL as a CRM property. When you review your pipeline in 90 days, you will know exactly which pages are generating quality enquiries and which need attention.
The automation workflow that works best for most small UK service businesses captures leads from the form, deduplicates by email, maps all fields, tags the lead source, and fires an instant notification to the relevant team member. That five-step sequence covers the majority of what you need.
What are the real goals of connecting your enquiry form to a CRM?
The practical goal is simple: no lead should rely on a human remembering to act. When a potential customer submits an enquiry at 10pm on a Friday, the CRM should already have their record, their service interest, and a follow-up task assigned before anyone checks their inbox on Monday morning.
Beyond that, the goals are:
- Pipeline visibility: every active lead is visible in one place, with its current status
- Faster response: automated notifications mean the right person knows about a new lead within minutes
- Accurate attribution: knowing which pages and campaigns generate leads informs where to invest next
- Reduced admin: your team spends time on conversations, not data entry
For UK service businesses, where enquiry drop-off is a persistent problem, a properly connected form-to-CRM workflow is one of the highest-return changes you can make to your website.
Which CRM platforms work well with common enquiry form tools?
Most mainstream CRM platforms support form integration through at least one of the three methods covered in this guide. Here is how the most widely used options compare for UK small businesses:
WPForms connects natively to HubSpot, Zoho CRM, and Salesforce via dedicated add-ons. It also supports Zapier for any CRM not covered by a native connector. Setup requires no coding; field mapping happens inside the WordPress dashboard.
Contact Form 7 does not include native CRM connectors out of the box, but WordPress plugins bridge that gap cleanly. Dedicated plugins connect Contact Form 7 directly to HubSpot, Zoho CRM, and Pipedrive, handling field mapping and duplicate logic without a third-party automation service.
SuiteCRM is an open-source CRM that accepts form data via its built-in web-to-lead forms or through webhook endpoints. It suits businesses that want full control over their CRM data without a monthly subscription.
Jetpack CRM is a lightweight WordPress-native CRM that captures form submissions directly from Contact Form 7 and WPForms through its own extension library. Because it lives inside WordPress, latency is minimal and there are no external API calls to manage.
For businesses already using Microsoft 365, Power Automate connects most form tools to Dynamics 365 or to a SharePoint list acting as a lightweight CRM, without needing a separate iPaaS subscription.
How to build useful automations after your form connects to your CRM
Once the basic connection is live and tested, you can layer automations that turn a passive data feed into an active sales process. The most effective ones for service businesses are:
Instant lead notification: when a new record is created, send an email or Teams message to the assigned sales person with the lead’s name, service interest, and contact details. Response time drops from hours to minutes.
Automated acknowledgement: trigger an email to the enquirer confirming receipt, setting expectations on response time, and linking to any relevant information (pricing guide, service area, booking page). This alone reduces the number of “just checking you got my message” calls.
Lead scoring by intent signal: if your form captures a budget range or service type, use a CRM workflow rule to score or tag the lead automatically. High-value enquiries get routed to a senior team member; lower-priority ones enter a nurture sequence.
Follow-up task creation: create a CRM task assigned to the relevant team member, due within a defined window (two hours for high-priority leads, 24 hours for standard ones). No lead sits unactioned because it was not noticed.
Pipeline stage progression: move the lead from “New Enquiry” to “Contacted” automatically once the first outbound email or call is logged, keeping your pipeline view accurate without manual updates.
These automations do not require complex development. Most CRM platforms include workflow builders that handle these triggers visually. The service business automation examples that deliver the fastest return are almost always the simplest: notify, acknowledge, assign, follow up.
Ready to connect your enquiry forms to your CRM?

gtwelve builds and connects enquiry forms directly into CRM systems, follow-up workflows, and tools like Microsoft 365 for UK service businesses. If you want leads to arrive in your pipeline automatically, with the right data and the right person notified, get in touch with gtwelve to discuss your setup.
Key takeaways
Connecting your enquiry form to a CRM routes every submission into a live lead record automatically, eliminating manual data entry and ensuring no enquiry falls through the gaps.
| Point | Details |
|---|---|
| Prepare a field mapping document first | List every form field, its CRM counterpart, and the data type before touching any settings. |
| Use a dedicated API user | A separate service account with limited permissions prevents silent failures if credentials change. |
| Choose the right integration method | Native connectors suit simple setups; webhooks suit high-volume needs; iPaaS suits multi-tool workflows. |
| Test with real data before going live | Submit actual test entries and verify deduplication, field values, and notifications all fire correctly. |
| Build automations after the connection is stable | Instant notifications, acknowledgement emails, and follow-up tasks turn a data feed into an active pipeline. |
Recommended
If this sounds like your website, we can take a look.
Note 03 of 72